
Although it's an exciting feeling to be hosting a baby shower, it's also a challenge. You have to prepare the guest list, food, decorations, entertainment, favors etc.. These things tend to get pricey. I know how hard it is to come up with cute ideas on a budget. That's why I've compiled a list of some of my most favorite, simple, and frugal baby shower favors and treats.
1. Cupcake and Dessert Server
1. Cupcake and Dessert Server
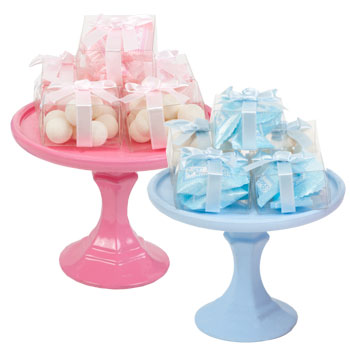
We can thank the Dollar Tree for this adorable project. This could make a sweet centerpiece for the baby shower. Not only can you display cupcakes and desserts, but you can also display party favors. This craft is easy to make with these step-by-step directions.
*Click the pdf link for instructions to this project.
*Click the pdf link for instructions to this project.
| Cupcake and Dessert Server Instructions |
2. On-the-Go Diaper Clutch
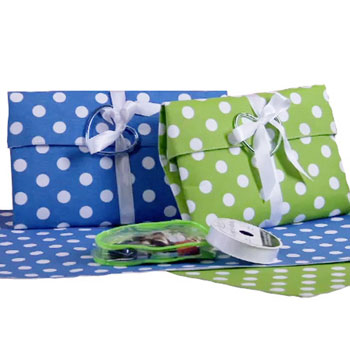
Another fabulous idea from the Dollar Tree. I love this idea! It's so easy, cute, and useful. You can also express yourself by choosing different patterned place-mats. The sky's the limit when creating your own masterpiece. This project also comes with an instruction sheet with easy step-by-step directions.
*Click the pdf link for instructions to this project.
*Click the pdf link for instructions to this project.
| On-the-Go Diaper Clutch Instructions |
3. Baby Bottle Shower Favors
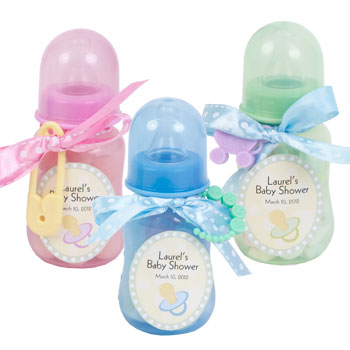
Yet another darling idea from the Dollar Tree. Look how easy it is to save money while not compromising cuteness. These are great because not only are they cute, but they can hold stuff inside. So you can put candy, money, or whatever your heart desires inside. This project also comes with an instruction sheet and templates as shown in the picture. Now isn't it easy and budget-friendly?
*Click the pdf link for this cute project.
*Click the pdf link for this cute project.
| Baby Bottle Shower Favors Instructions |
4. Blooming Favor Boxes
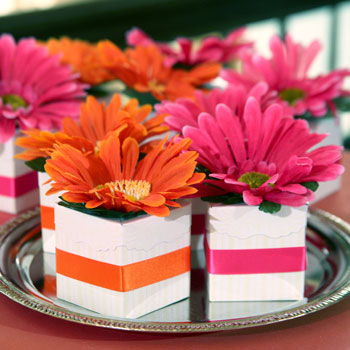
I did post this project in my Dollar Tree Wedding post. But I thought this would work just as well for a baby shower. All you would need to do is put the flowers and ribbons in baby colors. Wah lah! You'll have the perfect favor box that can hold some yummy goodies inside. This project also has step-by-step instructions.
*Click the pdf link for instructions on this fantastic project.
*Click the pdf link for instructions on this fantastic project.
| Blooming Favor Boxes Instructions |
5. Nail Polish Favors
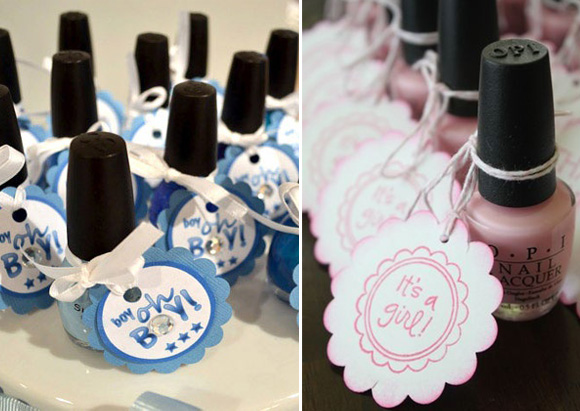
I thought this was a cool idea! Who doesn't love nail polish?Since your guest list is most likely going to be all ladies, why not give them a gift they can really put to good use. Plus it will match the décor at the party. You can choose any color you want, but pink and blue are of course the traditional boy/girl colors. Although this is not specifically a Dollar Tree project, I'm sure you can find nail polish there. If not, then just pick a budget-friendly option at another store. You can find similar tags and/or ribbon at craft stores and maybe even the Dollar Tree or Walmart. Otherwise, you can create your own.
6. Votive Candle in Organza Bag
6. Votive Candle in Organza Bag

This is a super cute idea and candles are always a hit! This is not a Dollar Tree project, but it certainly can be one. I have seen them sell the organza bags and the votive candles. You don't have to specifically use the colors in the picture. You can go with a solid white, or whatever color works for you. Furthermore, you could personalize these with tags from a store, or that you create on your own. The possibilities are endless when you put your mind to it.
7. Floating Duckies
7. Floating Duckies
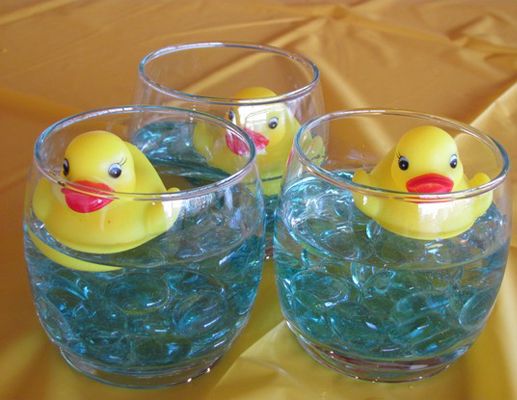
This is totally cute! Some ladies like to have a specific theme for their baby showers. What could be any more adorable than floating duckies? These can make a charming centerpiece or be spread out in locations throughout your shower. First you need to get a glass cup, candle-holder, or other object that's similar to the above picture to hold the contents. Next grab some rubber duckies and marbles or rocks. Finally just fill the glass container with the contents and add water. Create as many as you'd like, or just use a larger glass container and make one big duck pond. Remember I'm just showing you the ideas, but this is your project. So put whatever 'spin' you'd like to on it. Again, this is not specifically a Dollar Tree craft. But I'm sure all or most of the items needed to create this project can be found at the Dollar Tree.
8. Marshmallow Pops
8. Marshmallow Pops
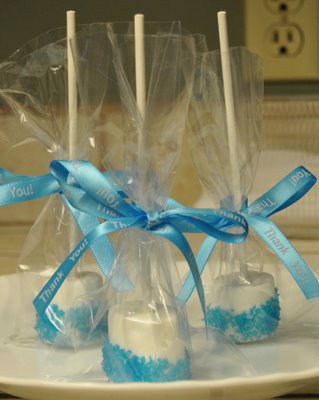
These are such a 'sweet' edible decoration. Did you catch my pun? I picked this idea up at fun-baby-shower-ideas-and-more.com. They definitely make a great treat for your guests. They are very simple and inexpensive to make and you can do them in any color to match your color scheme.
What you'll need:
Marshmallows
Lollipop Sticks or Candy Sticks
Candy Melts in desired color **(optional)
Sprinkles
Lollipop or treat bags
Ribbon
Steps:
1. Insert a lollipop/candy stick into each marshmallow, making sure not to poke it through the other side. Set aside.
2. Put Candy Melts in a medium sized bowl and melt in the microwave. Start with 1 minute on high, stir. Keep heating 20-30 seconds at a time until completely melted.
3. Take a marshmallow and dip it into the melted candy, covering about 1/2 to 3/4 of the marshmallow. When you pull it out, twist it back and forth to let the excess drip off, or gently tap the stick on the side of the bowl.
4. Hold over a plate and sprinkle with sprinkles, twisting around to cover all the sides. Stand up on waxed paper and allow candy to dry and harden. You can also stick the lollipop stick in a piece of styrofoam with the marshmallow sticking up.
5. Put them in a lollipop bag or treat bag after they have dried completely. Tie the bag closed with ribbon. If you'd like you can attach a favor tag for an extra touch.
**If you choose not to use the Candy Melts, you can just quickly dip the marshmallow in a bowl of water, blot it with a paper towel and roll it around in a small bowl filled with sprinkles.
9. Candy Pacifier Party Favors
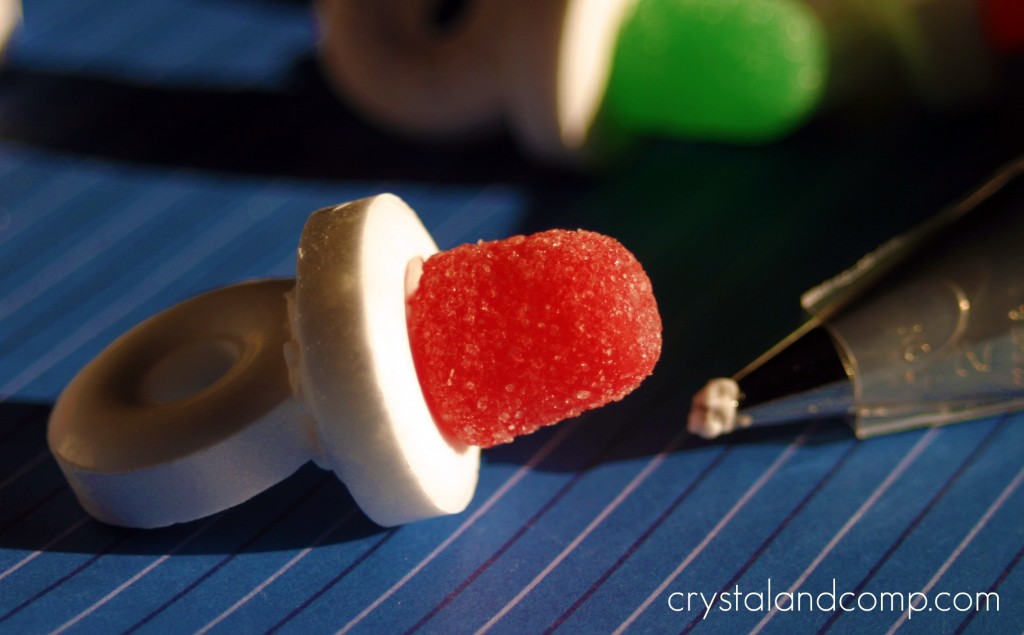
I just loved these when I saw them. They are very simple to create and definitely frugal. You can choose to make necklaces out of these with ribbon or just put them in a pretty candy dish. Special 'shout out' to crystalandcomp.com for this adorable favor.
What you'll need:
Lifesavers
Gumdrops
Royal Icing (you can buy this prepackaged and you just add water)
Icing bag and small tip (you can use a Ziploc bag and just snip the tip off)
Ribbon (optional)
Steps:
1. Gather all supplies.
2. Prepare the royal icing and place it in an icing bag assembled with a tip that will allow the icing to flow easily but with control from the bag.
{a Ziploc bag should do just as well.}
3. Use the royal icing to attach two lifesavers together making a ‘T’ as the picture below illustrates.
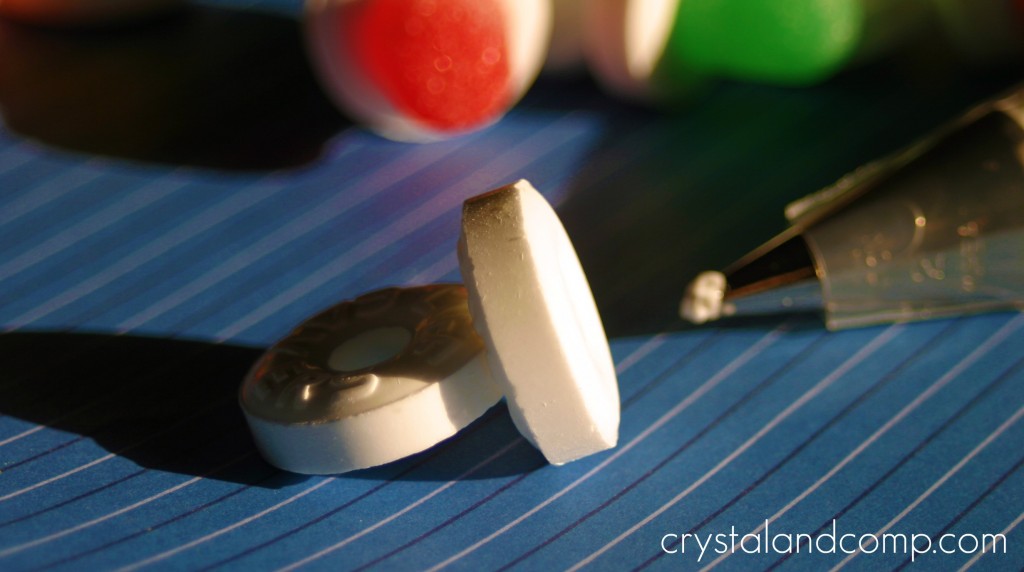
4. Use the royal icing to glue a gum drop to the top of the lifesaver ensemble as shown in the first picture.
5. Let the royal icing dry for a couple of hours to ensure the candy is secure and intact.
6. Then use ribbon, you can go as expensive or inexpensive as you want, to make a necklace strand that will allow your guests to wear these delicious party favors at the baby shower.
{or just place them in a pretty candy dish.}
10. Baby Bootie Cups
I am going to have to credit this last favor to a very talented craft-woman that I came across a long time ago on Youtube.
Heather from Partytimebaby.com came up with this adorable and cheap idea! I'm going to just post the Youtube video for you to view her easy step-by-step instructions. She is really fun to watch too! I just want to add that there is one thing that I would change about this project. You don't have to, it's just a suggestion. In the video she's going to pour the candy/treats directly into the bootie cup. I would pour the candy/treats into an organza bag or tulle tied with ribbon. Then let that bag sit inside the bootie cup. I feel that this will be a little cuter and will keep the goodies from falling out. Let me know what you think. Here's the video:
~Well, that's all there is for now. When more fantastic ideas come along, I will be sharing them with you. Hope you enjoyed this post and have fun putting your unique touches on these ideas. Please leave me a comment and let me know what you think of these ideas or if you have any awesome suggestions of your own.~
**This blog contains affiliate ads or links. By clicking these links it will take you to a site that gives you the opportunity to view and/or purchase products relative and non-relative to the blog topic. Clicking these links will give Nikki-Liz-Blogs a small commission and does not increase your price on any product.
 RSS Feed